Uptime Kuma is an open-source, self-hosted monitoring solution that works on Windows and Linux. It's designed to track the uptime, downtime, and responsiveness of various internet services.
It offers an intuitive web interface where you can add and monitor services using different protocols like HTTP/S, TCP, ICMP (Ping), and more.
One of the key features of Uptime Kuma is its support for multiple notification channels, including email, Telegram, Discord, Slack, and others, allowing you to receive immediate alerts when a monitored service goes down or experiences issues.
Uptime Kuma also provides detailed reporting features, allowing you to easily review uptime history, response times, and outage incidents of any given monitored service.
Overall, Uptime Kuma is one of the best tools for system administrators, webmasters, and IT professionals looking for a reliable and cost-effective (as in... free) way to monitor their digital infrastructure's health.
What makes it even better, is the fact it's incredibly easy to install and manage.
In fact, let me show how to set up Uptime Kuma:
Step 1) Find a host for your uptime monitor
First things first, you'll need to source a Linux server to host Uptime Kuma (or Windows, but I wouldn't recommend it). Nearly any Linux distribution would work, but I usually use Debian 12.
Technically you could host an instance at home from something like a Raspberry Pi, but you'll have a better experience using a remote VPS for constant availability. After all, an uptime monitor can't do much good if it's down.
Also, some residential connections may only issue IPv4, which could lead to difficulties monitoring services from home.
Over here at xTom, we have our V.PS branch with locations available worldwide for less than the price of a cup of coffee. Our smallest VPS plan comes with both IPv4 and IPv6 and would be able to host an Uptime Kuma instance, it doesn't take much (Debian 12 is available as a one-click installation too).
You can get a VPS for hosting Uptime Kuma right here.
Anyway, once you've sourced a Linux server, you're ready to move on:
Step 2) Install Docker Compose and Uptime Kuma
Docker allows you to containerize applications, making shipping and deploying them much easier. However, we'll be specifically using Docker Compose, which will allow us to create a persistent environment for our Uptime Kuma container.
First things first, we need to add the Docker repository to our sources. By the way, the following examples are specifically suited for Debian 12, but will work with minor tweaks on any Debian-based distribution like Ubuntu:
# Add Docker's official GPG key:
sudo apt update
sudo apt install curl gnupg dpkg apt-transport-https lsb-release ca-certificates
sudo curl -sS https://download.docker.com/linux/debian/gpg | sudo gpg --dearmor > /usr/share/keyrings/docker-ce.gpg

# Add the repository to Apt sources:
echo \
  "deb [arch=$(dpkg --print-architecture) signed-by=/usr/share/keyrings/docker-ce.gpg] https://download.docker.com/linux/debian $(lsb_release -sc) stable" | \
  sudo tee /etc/apt/sources.list.d/docker.list > /dev/null
sudo apt update
(Note: sudo is used to elevate privileges, if you're on the root user, you don't need to use it.)
Next, we'll install Docker and Docker Compose:
sudo apt install docker-ce docker-ce-cli containerd.io docker-compose-plugin
Then make a new directory for your Uptime Kuma installation:
mkdir uk
cd uk
Now we'll need to set up our Docker Compose configuration file:
nano compose.yml
Then paste the following inside:
# Simple docker-compose.yml
# You can change your port or volume location

version: '3.3'

services:
  uptime-kuma:
    image: louislam/uptime-kuma:1
    container_name: uptime-kuma
    volumes:
      - ./uptime-kuma-data:/app/data
    ports:
      - 3001:3001  # <Host Port>:<Container Port>
    restart: always
Close and save, and then run the following:
docker compose up -d
If successful, everything will automatically be installed and the container will be started:
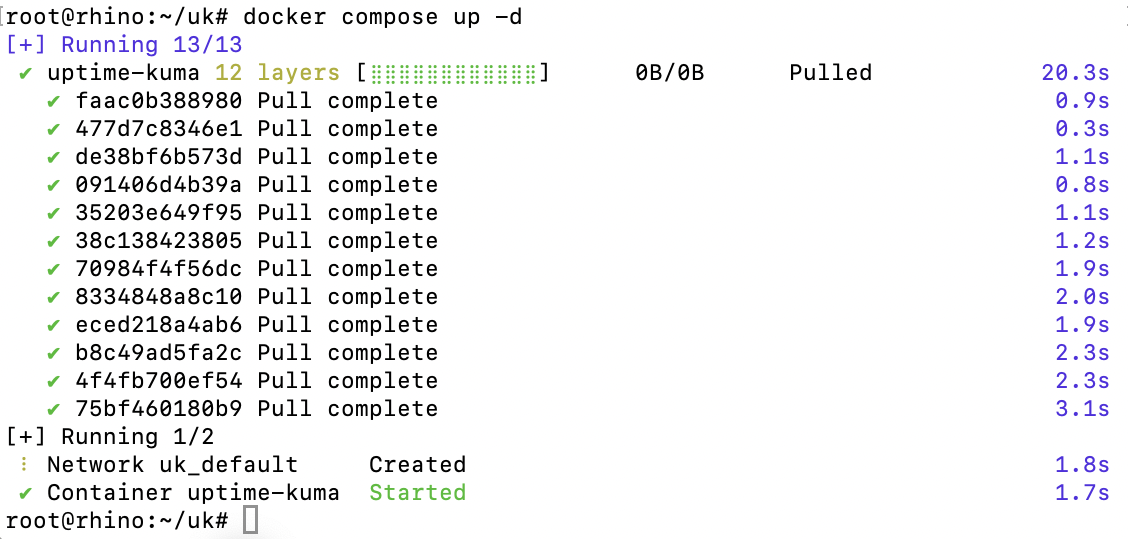
(Note: The "-d" at the end enables detached mode, allowing you to run Uptime Kuma in the background. You could host other Docker applications simultaneously.)
Step 3) Configure Uptime Kuma
You can then navigate to Your_IP:3001 in your browser, and proceed to set up your admin account:
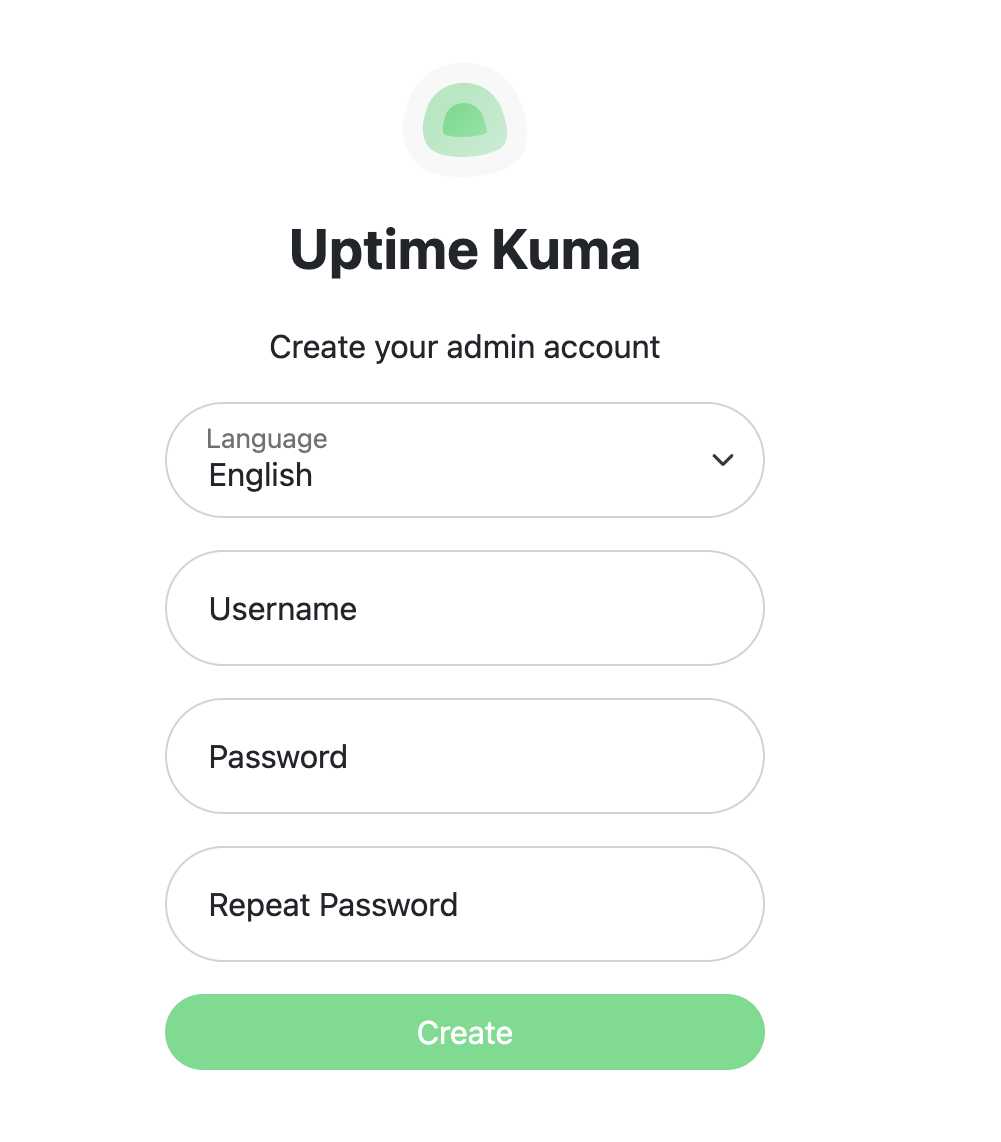
After that, you can configure Uptime Kuma to monitor whatever you'd like!
Conclusion
Uptime Kuma, with its comprehensive monitoring capabilities and support for numerous notification methods, offers a robust solution for anyone looking to monitor their digital infrastructure.
Plus, by leveraging Docker and Docker Compose, Uptime Kuma can be easily deployed on any server by practically anyone.
That said, we hope you found this guide valuable, and as always, xTom would love to be the home of your digital infrastructure.
As mentioned above, our VPS plans here are a cost-effective way to self-host your favorite applications like Uptime Kuma without sacrificing reliability. Please do consider giving us a try.
Also, to learn more about the different ways we can help, you can view all of our services available here (dedicated, colocation, transit, hands-on IT services, and more).
Thanks for reading!