Pterodactyl Panel is a popular free and open-source game server management panel that supports Minecraft.
In this article, we'll be showing you how to use it to set up and administer your very own self-hosted Minecraft server.
Let's dive in.
Step 1: Find a host
We're a little biased, but we'd recommend us.
While we have dedicated servers and colocation available over at xTom for larger Minecraft servers and networks, our cheaper VPS brand works perfectly for hosting smaller or personal Minecraft servers, and we have locations around the world.
Some people might opt to host their server at home if it's just a few people, but it can be rather difficult to get things set up if you don't have a static IP address. Also, residential connections can be both flakey and explicitly disallow hosting any kind of server on it.
So it's just generally better to find a cheap host, specifically a small KVM VPS host to run your Minecraft server on.
At least 2GB RAM for a small server, but I'd recommend 4GB, maybe more depending on the amount of players you expect and the amount of plugins you want to add.
Also, in this article, our commands will be tailored to Debian 12, a Linux distribution, but Pterodactyl Panel also supports other Linux distributions such as Ubuntu and CentOS (AlmaLinux and Rocky), you'd just have to slightly alter some of these commands.
Additionally, we'll assume you have a free domain/subdomain available and have that pointed towards your Linux server. If you don't already have one, you can get a domain from us here.
Moving on:
Step 2: Access your server
First, we'll need to SSH into our VPS:
ssh root@your_vps_ip
Then we'll create a new user for Pterodactyl Panel:
adduser pterodactyl
It'll ask you to fill out some information, such as a password. After that, run the following:
usermod -aG sudo pterodactyl
That'll give your new user sudo privileges. Now switch over to the new user with the following command:
su - pterodactyl
Step 3: Install Pterodactyl Panel and its dependencies
Next, we'll need to update Debian and install the dependencies Pterodactyl Panel requires:
# Update your system's package index
sudo apt update && sudo apt upgrade -y

# Install necessary dependencies
sudo apt -y install software-properties-common curl apt-transport-https ca-certificates gnupg lsb-release

# Add the SURY PHP PPA for PHP 8.1
sudo wget -O /etc/apt/trusted.gpg.d/php.gpg https://packages.sury.org/php/apt.gpg
echo "deb https://packages.sury.org/php/ $(lsb_release -sc) main" | sudo tee /etc/apt/sources.list.d/php.list

# Add the Redis official APT repository
curl -fsSL https://packages.redis.io/gpg | sudo gpg --dearmor -o /usr/share/keyrings/redis-archive-keyring.gpg
echo "deb [signed-by=/usr/share/keyrings/redis-archive-keyring.gpg] https://packages.redis.io/deb $(lsb_release -cs) main" | sudo tee /etc/apt/sources.list.d/redis.list

# Update repositories list to reflect the newly added repositories
sudo apt update

# Install PHP 8.1 and some common extensions, as well as Nginx, Redis, and other necessary tools
sudo apt -y install php8.1 php8.1-common php8.1-cli php8.1-gd php8.1-mysql php8.1-mbstring php8.1-bcmath php8.1-xml php8.1-fpm php8.1-curl php8.1-zip mariadb-server nginx tar unzip git redis-server
Next, we'll install Composer:
curl -sS https://getcomposer.org/installer | sudo php -- --install-dir=/usr/local/bin --filename=composer
After that we'll make our directory for Pterodactyl Panel:
mkdir -p /var/www/pterodactyl
cd /var/www/pterodactyl
And then download Pterodactyl Panel:
curl -Lo panel.tar.gz https://github.com/pterodactyl/panel/releases/latest/download/panel.tar.gz
tar -xzvf panel.tar.gz
chmod -R 755 storage/* bootstrap/cache/
Next, we'll need to set up MariaDB, so run the following command:
mysql -u root -p
The password should be your default password.
Then we'll create a new database and user for Pterodactyl Panel:
-- Remember to change 'yourPassword' below to be a unique password
CREATE USER 'pterodactyl'@'127.0.0.1' IDENTIFIED BY 'yourPassword';
CREATE USER 'pterodactyl'@'localhost' IDENTIFIED BY 'yourPassword';

CREATE DATABASE panel;

GRANT ALL PRIVILEGES ON panel.* TO 'pterodactyl'@'127.0.0.1' WITH GRANT OPTION;
GRANT ALL PRIVILEGES ON panel.* TO 'pterodactyl'@'localhost' WITH GRANT OPTION;

FLUSH PRIVILEGES;

-- Exit command to leave the SQL shell, if you're running this in an interactive session.
exit;
Now we'll copy over our environment settings file, install dependencies, and generate our application encryption key:
cp .env.example .env
composer install --no-dev --optimize-autoloader

# Only run the command below if you are installing this Panel for
# the first time and do not have any Pterodactyl Panel data in the database.
php artisan key:generate --force
(Note: Your .env file contains your encryption key. Back it up ASAP. You can open it up directly with nano /var/www/pterodactyl/.env.)
Then run:
php artisan p:environment:setup
php artisan p:environment:database

# To use PHP's internal mail sending (not recommended), select "mail". To use a
# custom SMTP server, select "smtp".
php artisan p:environment:mail
Next run:
php artisan migrate --seed --force
This will ask you several questions, including about your MariaDB password and a qualified domain name. Fill it all out accordingly, leaving the default settings for everything.
Then you'll need to add yourself as an administrator. To do so, run the following command and fill out your desired information:
php artisan p:user:make
Next, we'll fix our permissions:
chown -R www-data:www-data /var/www/pterodactyl/*
And setup a cronjob:
* * * * * php /var/www/pterodactyl/artisan schedule:run >> /dev/null 2>&1
Then run nano /etc/systemd/system/pteroq.service and copy and paste the following inside:
# Pterodactyl Queue Worker File
# ----------------------------------

[Unit]
Description=Pterodactyl Queue Worker
After=redis-server.service

[Service]
# On some systems the user and group might be different.
# Some systems use `apache` or `nginx` as the user and group.
User=www-data
Group=www-data
Restart=always
ExecStart=/usr/bin/php /var/www/pterodactyl/artisan queue:work --queue=high,standard,low --sleep=3 --tries=3
StartLimitInterval=180
StartLimitBurst=30
RestartSec=5s

[Install]
WantedBy=multi-user.target
And finally, we'll need to set Redis and Pterodactyl Panel to start on boot:
sudo systemctl enable --now redis-server
sudo systemctl enable --now pteroq.service
Step 4: Configuring NGINX
First, we'll remove the default NGINX configuration:
rm /etc/nginx/sites-enabled/default
Then run nano /etc/nginx/sites-available/pterodactyl.conf and paste the following inside, replacing <domain> with your domain:
server_tokens off;

server {
    listen 80;
    server_name <domain>;
    return 301 https://$server_name$request_uri;
}

server {
    listen 443 ssl http2;
    server_name <domain>;

    root /var/www/pterodactyl/public;
    index index.php;

    access_log /var/log/nginx/pterodactyl.app-access.log;
    error_log  /var/log/nginx/pterodactyl.app-error.log error;

    # allow larger file uploads and longer script runtimes
    client_max_body_size 100m;
    client_body_timeout 120s;

    sendfile off;

    # SSL Configuration - Replace the example <domain> with your domain
    ssl_certificate /etc/letsencrypt/live/<domain>/fullchain.pem;
    ssl_certificate_key /etc/letsencrypt/live/<domain>/privkey.pem;
    ssl_session_cache shared:SSL:10m;
    ssl_protocols TLSv1.2 TLSv1.3;
    ssl_ciphers "ECDHE-ECDSA-AES128-GCM-SHA256:ECDHE-RSA-AES128-GCM-SHA256:ECDHE-ECDSA-AES256-GCM-SHA384:ECDHE-RSA-AES256-GCM-SHA384:ECDHE-ECDSA-CHACHA20-POLY1305:ECDHE-RSA-CHACHA20-POLY1305:DHE-RSA-AES128-GCM-SHA256:DHE-RSA-AES256-GCM-SHA384";
    ssl_prefer_server_ciphers on;

    # See https://hstspreload.org/ before uncommenting the line below.
    # add_header Strict-Transport-Security "max-age=15768000; preload;";
    add_header X-Content-Type-Options nosniff;
    add_header X-XSS-Protection "1; mode=block";
    add_header X-Robots-Tag none;
    add_header Content-Security-Policy "frame-ancestors 'self'";
    add_header X-Frame-Options DENY;
    add_header Referrer-Policy same-origin;

    location / {
        try_files $uri $uri/ /index.php?$query_string;
    }

    location ~ \.php$ {
        fastcgi_split_path_info ^(.+\.php)(/.+)$;
        fastcgi_pass unix:/run/php/php8.1-fpm.sock;
        fastcgi_index index.php;
        include fastcgi_params;
        fastcgi_param PHP_VALUE "upload_max_filesize = 100M \n post_max_size=100M";
        fastcgi_param SCRIPT_FILENAME $document_root$fastcgi_script_name;
        fastcgi_param HTTP_PROXY "";
        fastcgi_intercept_errors off;
        fastcgi_buffer_size 16k;
        fastcgi_buffers 4 16k;
        fastcgi_connect_timeout 300;
        fastcgi_send_timeout 300;
        fastcgi_read_timeout 300;
        include /etc/nginx/fastcgi_params;
    }

    location ~ /\.ht {
        deny all;
    }
}
Then we'll need to request an SSL certificate from Let's Encrypt.
First, we need to install it:
sudo apt -y install certbot
And then run certbot:
sudo certbot certonly --standalone -d your_domain.com
(Note: Your domain must be pointed towards your server for the above to work.)
Finally, run:
sudo ln -s /etc/nginx/sites-available/pterodactyl.conf /etc/nginx/sites-enabled/pterodactyl.conf

sudo systemctl restart nginx
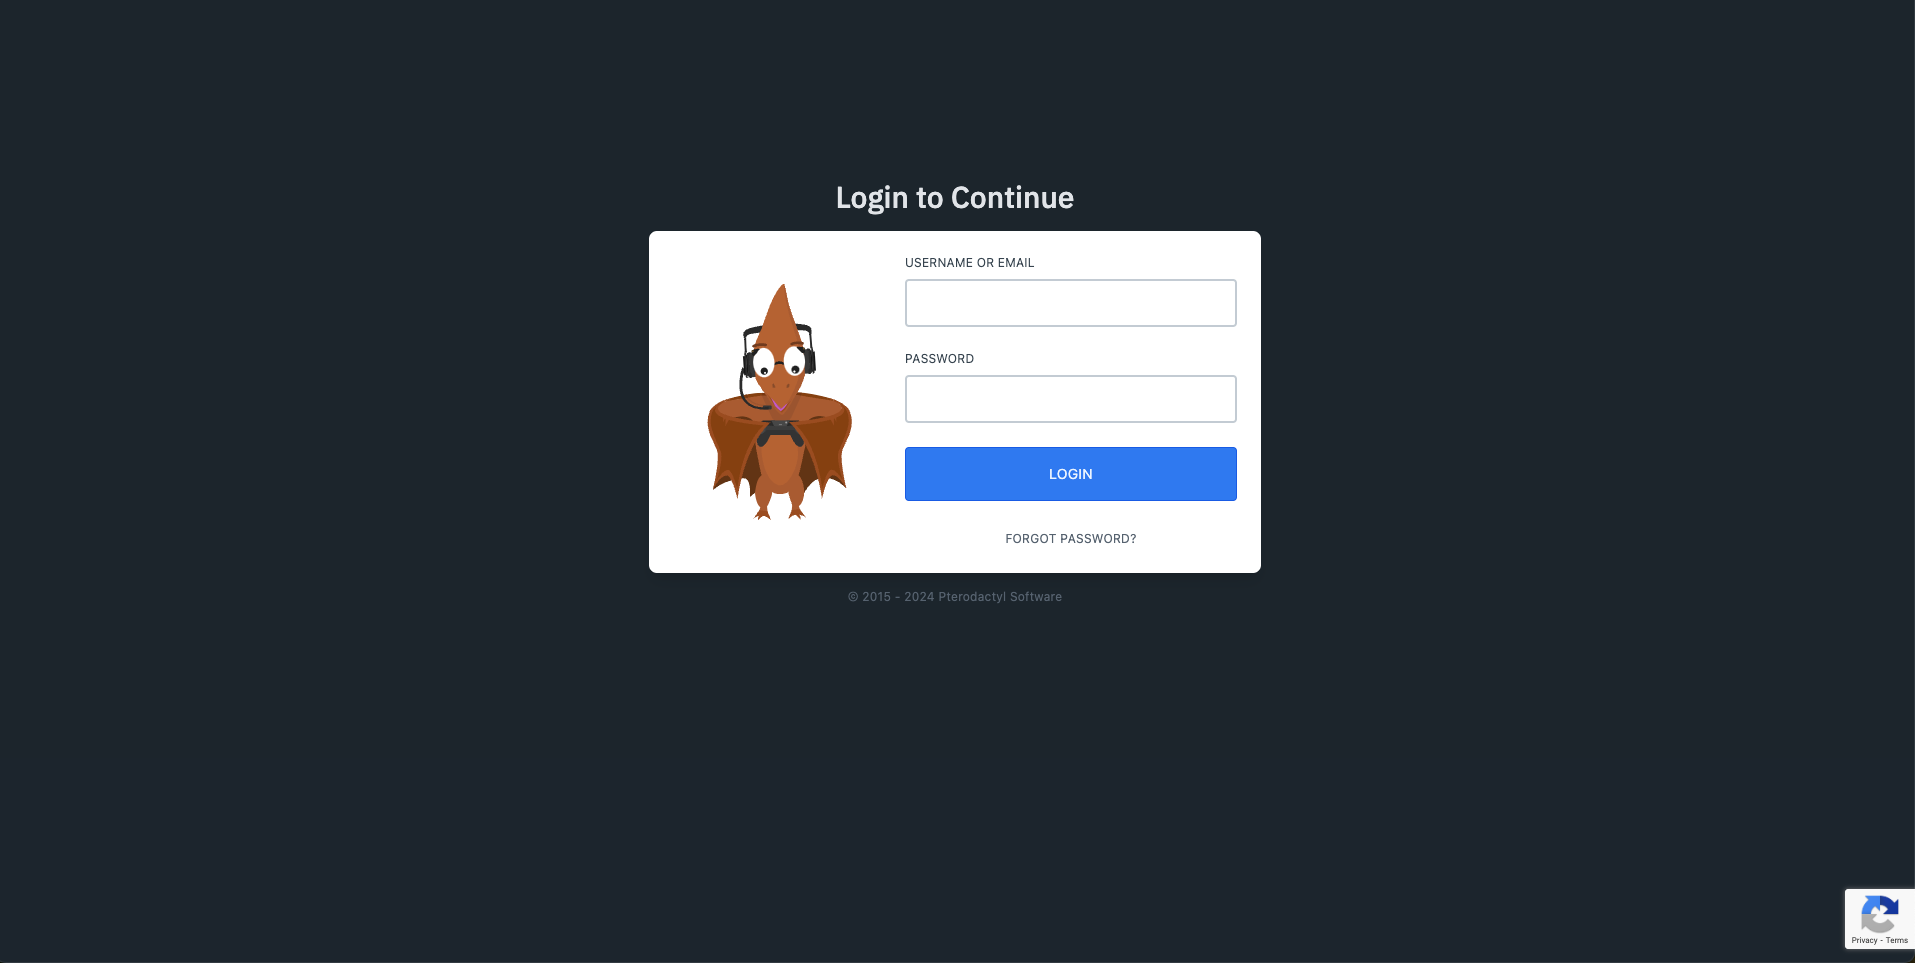
And then visit your domain in your browser. You should now see a Pterodactyl Panel login page:
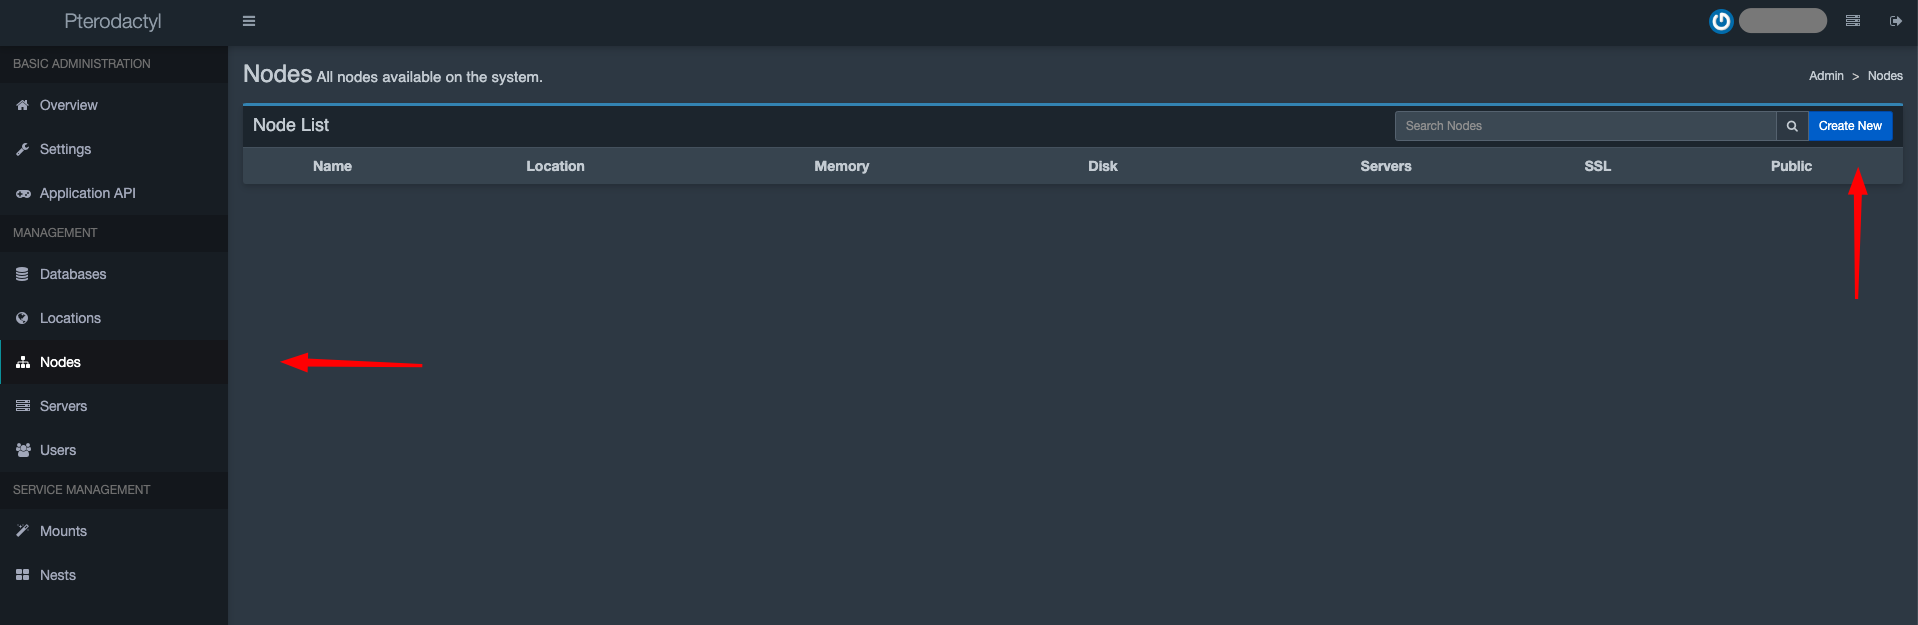
Step 5: Setup a node
In Pterodactyl, a "node" represents a server where game servers will run.
After logging in using your administrator account created earlier, you'll need to go to your settings tab to add a node:

Then you must first go to "Locations" and add a location.
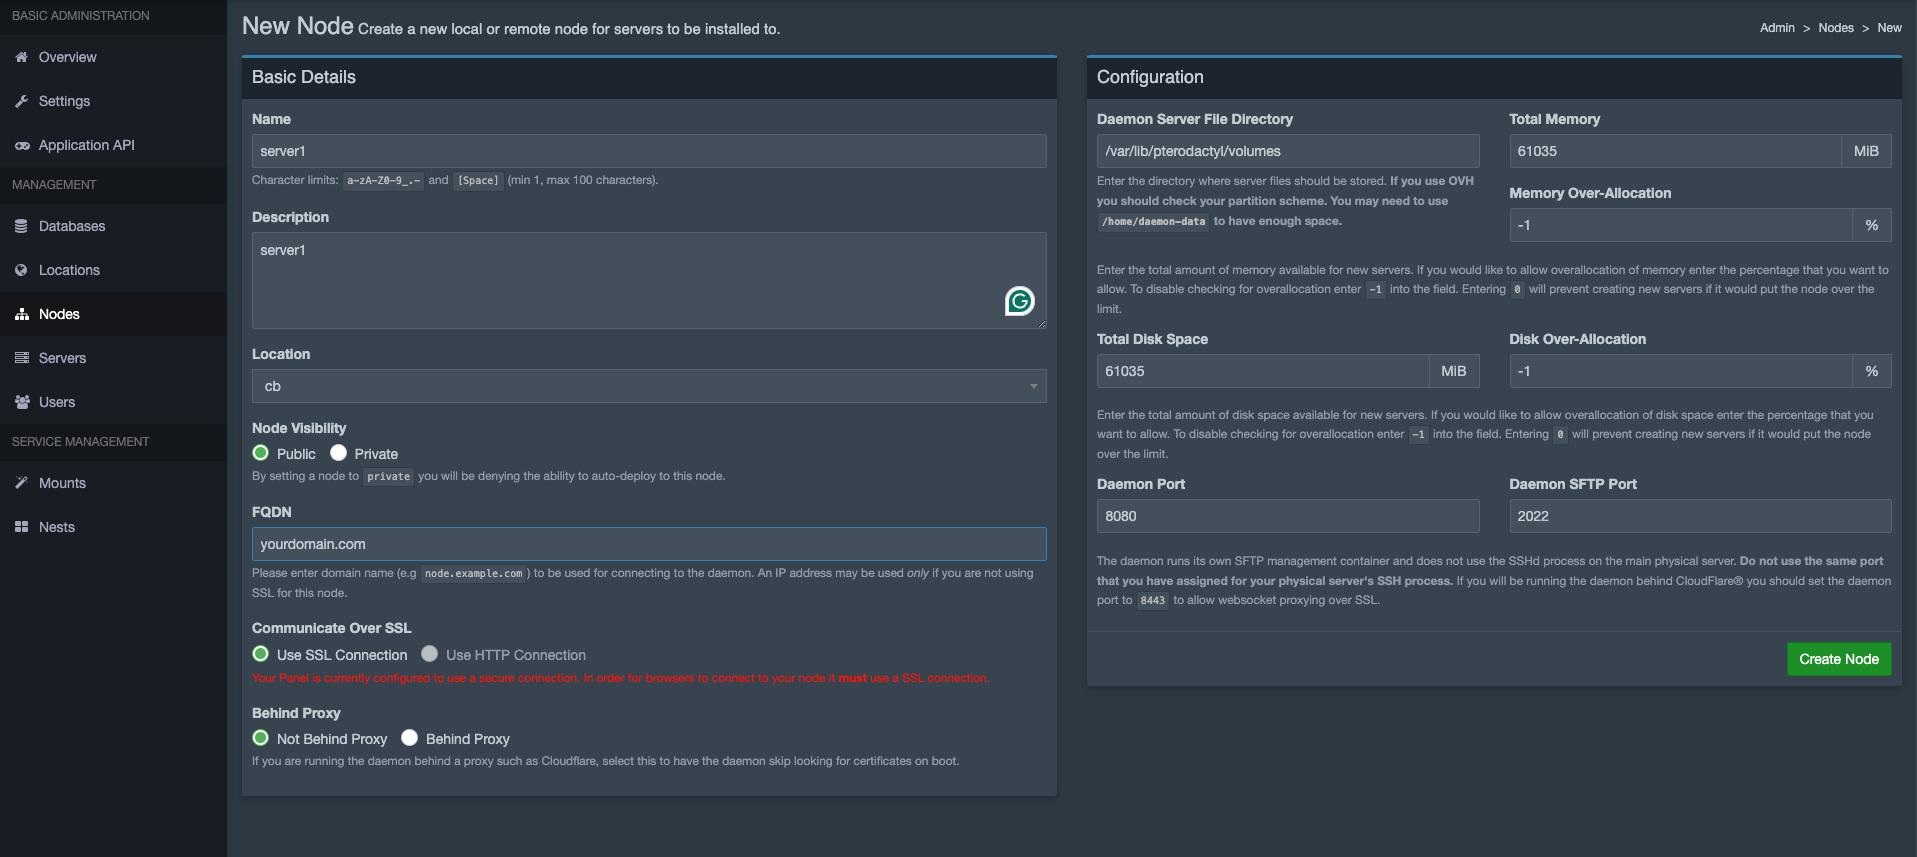
After that navigate to the "Nodes" section in your panel and create a new node, specifying its name, description, resources, and an associated FQDN (domain) or IP address:
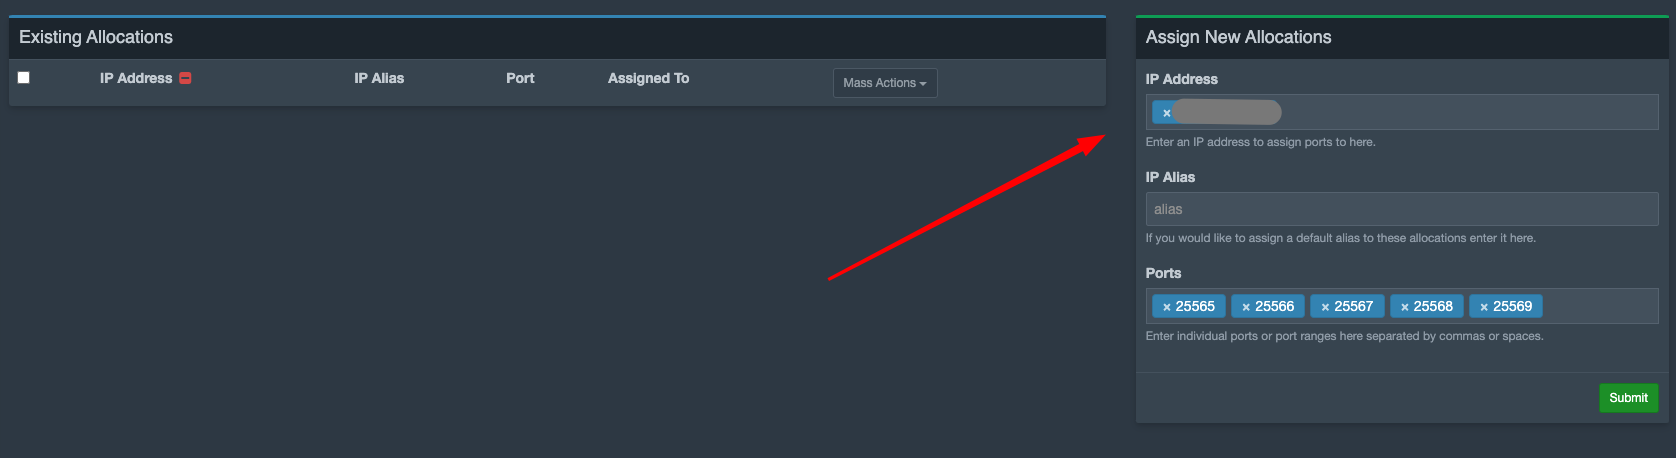
Next, assign any of your given IP addresses here, and add port ranges for your Minecraft servers on this node. The default Minecraft port is 25565:
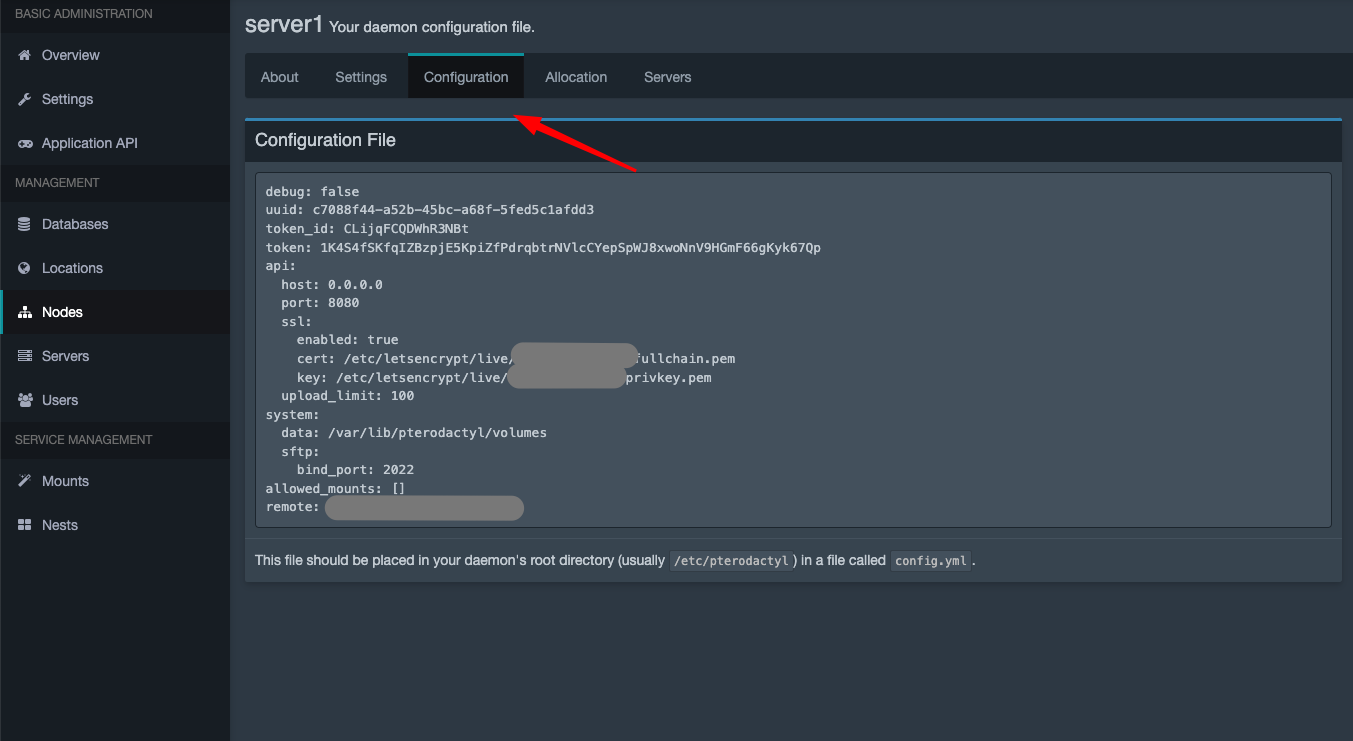
Finally, click over to the "Configuration" tab and keep this page open for later.
Step 6: Install Pterodactyl Wings
Wings is the Pterodactyl daemon that manages the game servers on a node.
To install Wings, we first need to install Docker, which is what Pterodactyl Panel relies on to spin up the container our Minecraft server will be running on:
curl -sSL https://get.docker.com/ | CHANNEL=stable bash
Then set Docker to start on boot:
sudo systemctl enable --now docker
Next, we'll install Wings:
sudo mkdir -p /etc/pterodactyl
curl -L -o /usr/local/bin/wings "https://github.com/pterodactyl/wings/releases/latest/download/wings_linux_$([[ "$(uname -m)" == "x86_64" ]] && echo "amd64" || echo "arm64")"
sudo chmod u+x /usr/local/bin/wings
Run nano /etc/pterodactyl/config.yml and then paste your configuration file from earlier inside, and then for the first time you start Wings, run the following command:
sudo wings --debug
This may take a few minutes.
Step 7: Deploy your Minecraft server
In the Pterodactyl panel, go to the "Servers" section and click "Create New". Fill in the server details, including name, owner, and the node it will run on.
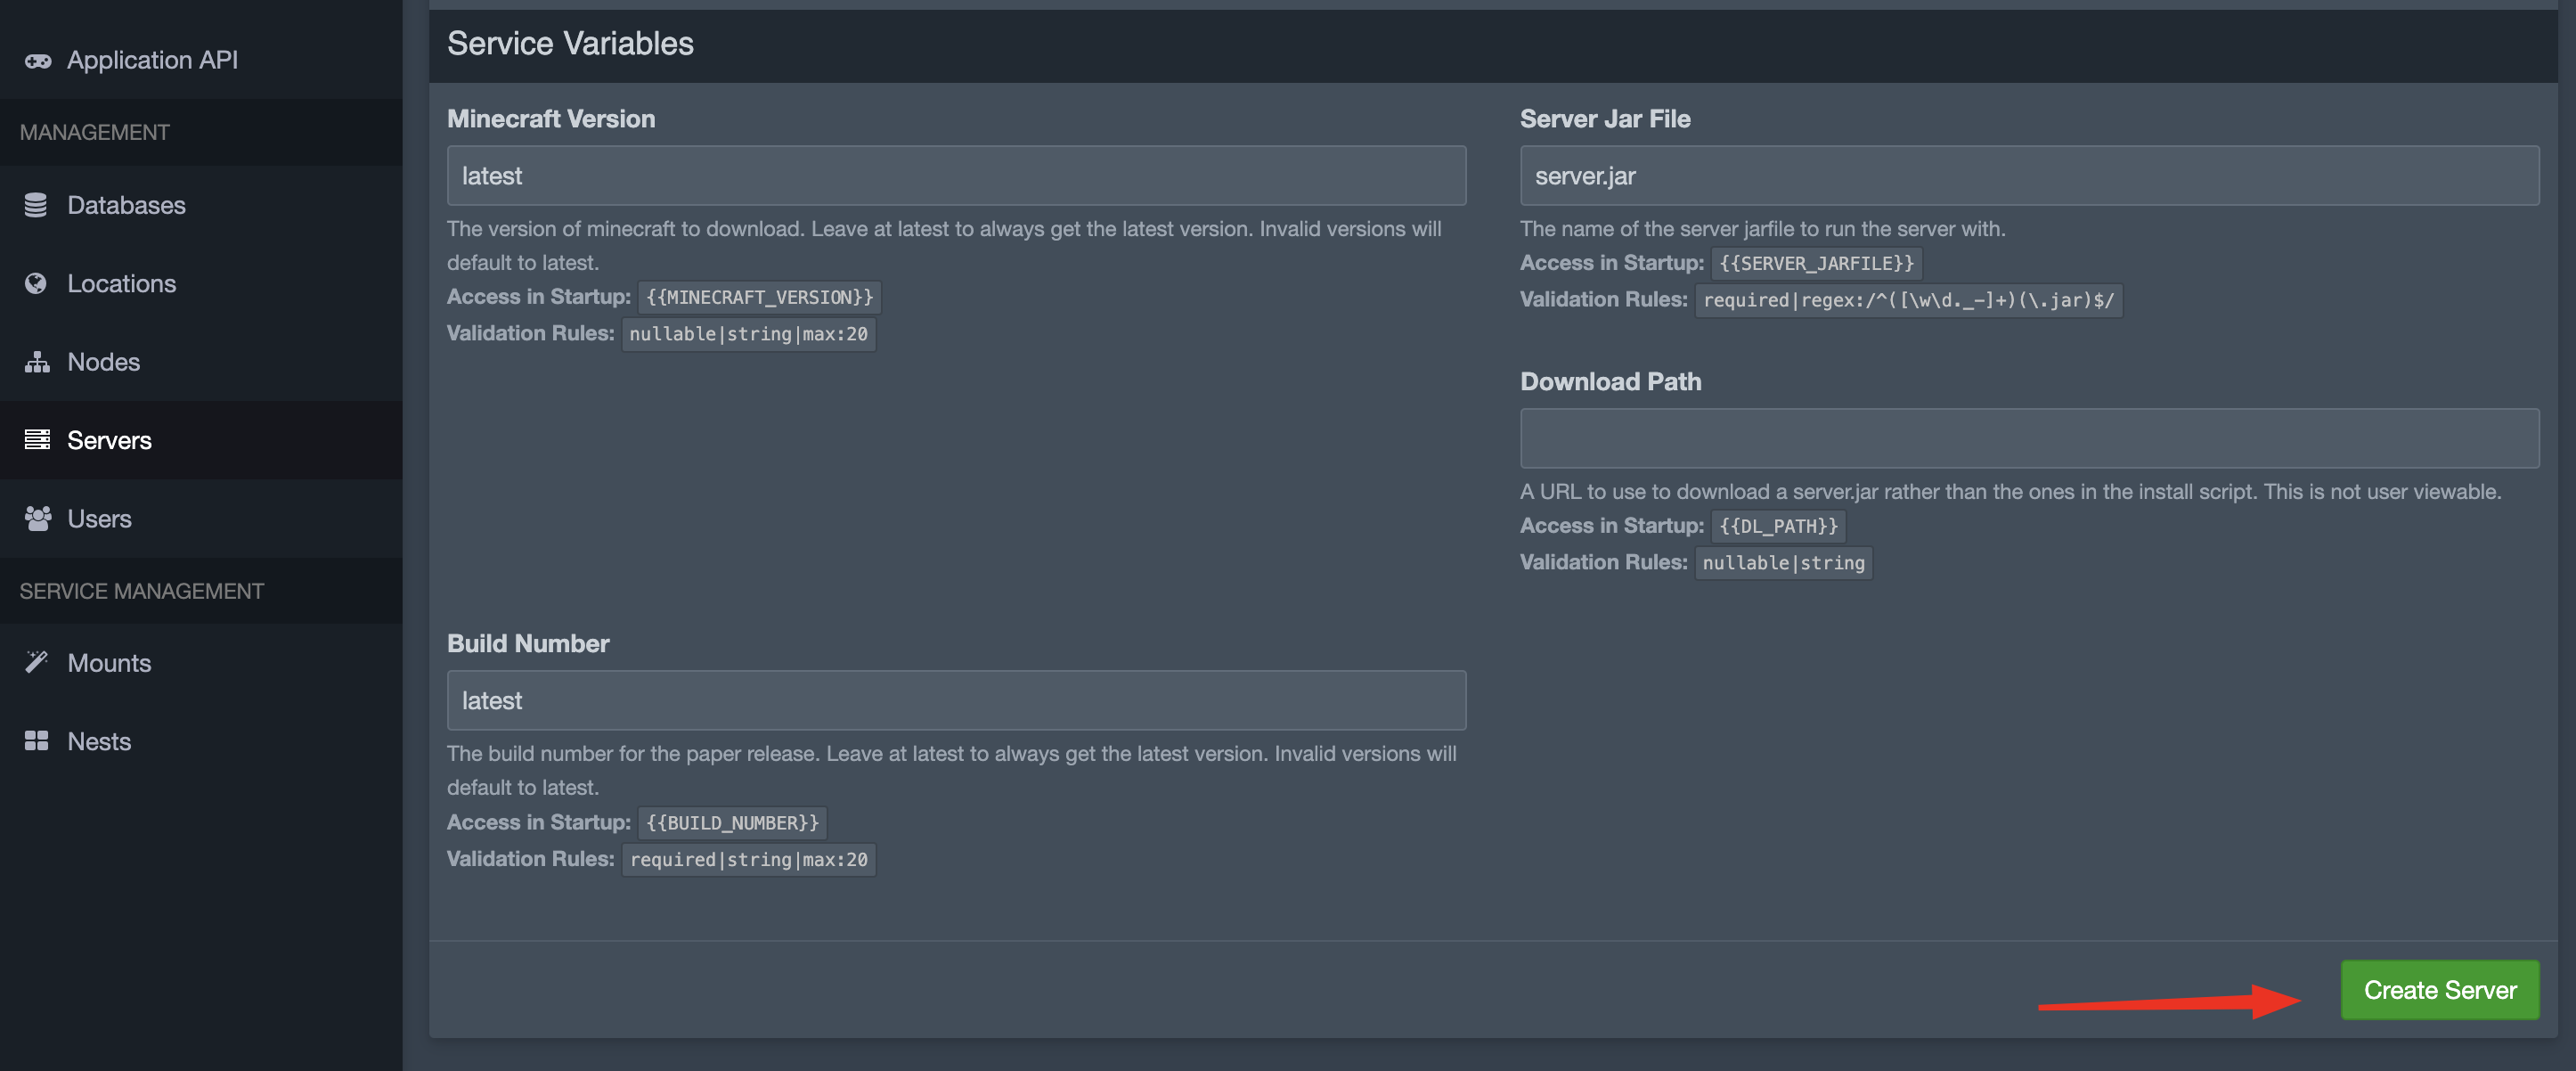
Then select "Minecraft" as the game and choose the server software you prefer (e.g., Vanilla, Spigot, Forge). It's entirely up to you. Pterodactyl provides "Eggs" which are templates for various server types and versions:
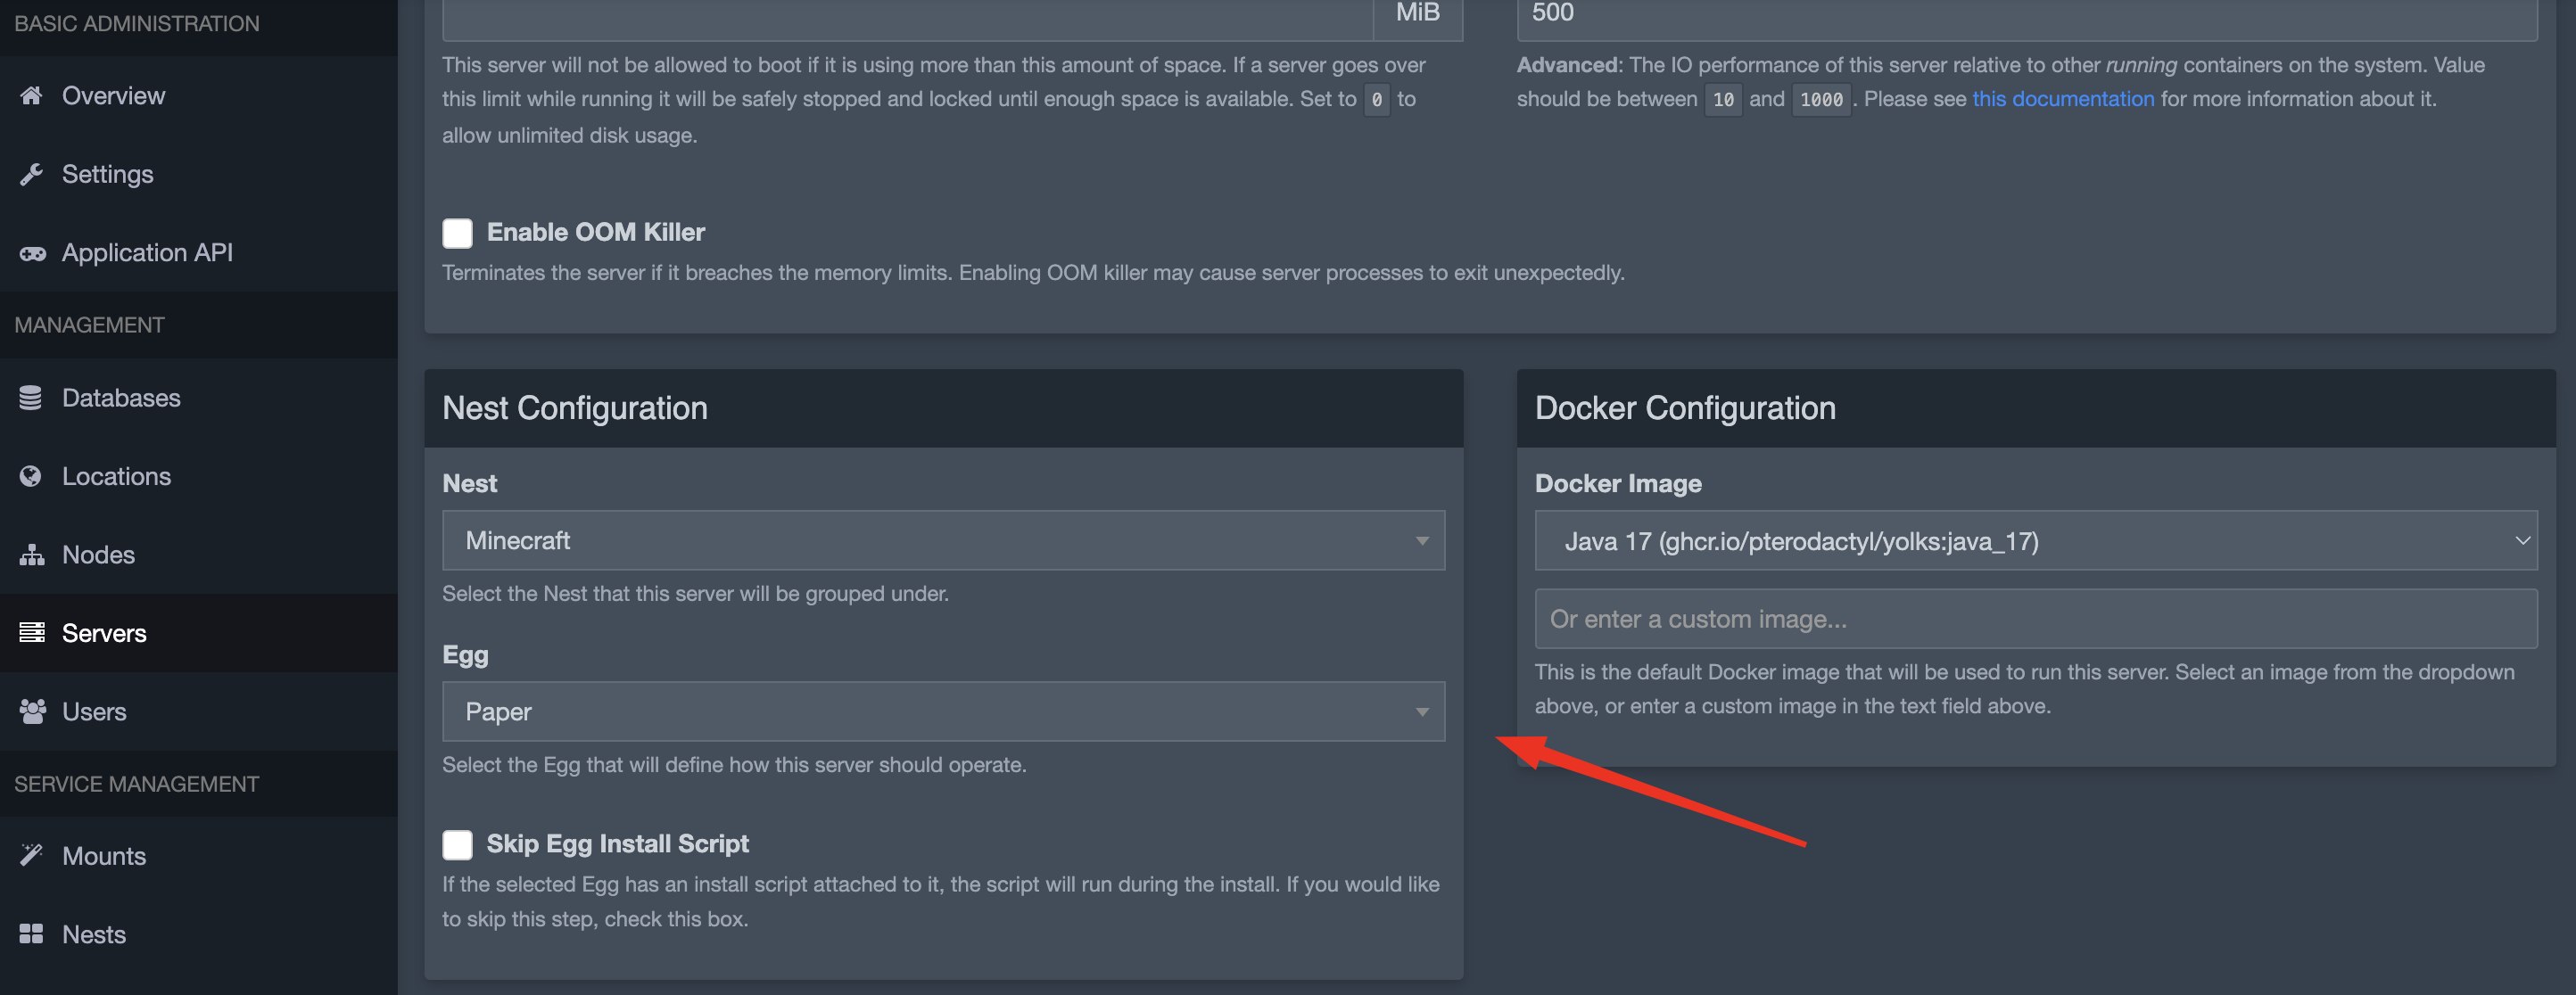
You'll also need to set the limits for disk space, memory, CPU, and network bandwidth.
Finally, once you've finished the configuration, create the server, and then start it:
You're now the proud owner of a Minecraft server!
One more step, though...
Step 8: Configure Wings to run in the background
After verifying everything is functional, close Wings, which should still be running in your terminal, and then run nano /etc/systemd/system/wings.service and paste the following inside:
[Unit]
Description=Pterodactyl Wings Daemon
After=docker.service
Requires=docker.service
PartOf=docker.service

[Service]
User=root
WorkingDirectory=/etc/pterodactyl
LimitNOFILE=4096
PIDFile=/var/run/wings/daemon.pid
ExecStart=/usr/local/bin/wings
Restart=on-failure
StartLimitInterval=180
StartLimitBurst=30
RestartSec=5s

[Install]
WantedBy=multi-user.target
Then run:
systemctl enable --now wings
That will reload systemd and start Wings (now running in the background).
Conclusion
With your Minecraft server now running, you can connect to it using the IP address and port you configured. Congratulations! That wasn't that hard, was it?
In conclusion, Pterodactyl offers a flexible and powerful platform for managing your Minecraft server, with features like automatic restarts, backups, and easy mod installation. It's worth giving a shot for your Minecraft server management needs.
For detailed instructions and troubleshooting tips, please refer to the official Pterodactyl documentation.
Thanks for reading, and if you're ever in need of hosting, anywhere from a dedicated server, to colocation, to a VPS, or beyond, please consider giving xTom a try.